Connecting Your App Store Connect (Previously iTunes Connect) Account
Linking your App Store Connect (previously iTunes Connect) account provides access to the following:
- Apps, including: iOS, macOS, and tvOS.
- Stickers and iMessage apps
- iBooks
- Songs, videos, and TV shows and episodes
For each we're tracking:
- App downloads and revenue
- In-App Purchase downloads and revenue
- Financial reports and payments
- Usage data
- Search Ads spend
- Hourly ranks
- Ratings
- Reviews
- Featured placements
Note: For the most secure access, we recommend setting up a separate sub-user inside of App Store Connect for Appfigures.
Admin or Owner role. If you are a viewer please share this article with a team member who has the required role.
Connecting Your App Store Connect Account
- Log into your Appfigures Account
- Go to your Linked Accounts by clicking on your name (top right) and then on "Link Account"
- Click on "Link an Account"
- Select App Store Connect from the list of providers
- Enter the email address and password for your Apple account
- Click on "Add"
Appfigures will now verify your information and link your account. Your data will begin populating in the next few minutes.
Creating a sub user in App Store Connect
To create a sub-user:
- Log into your App Store Connect
- Click on Users and Access
- Click the + button at the top of the page.
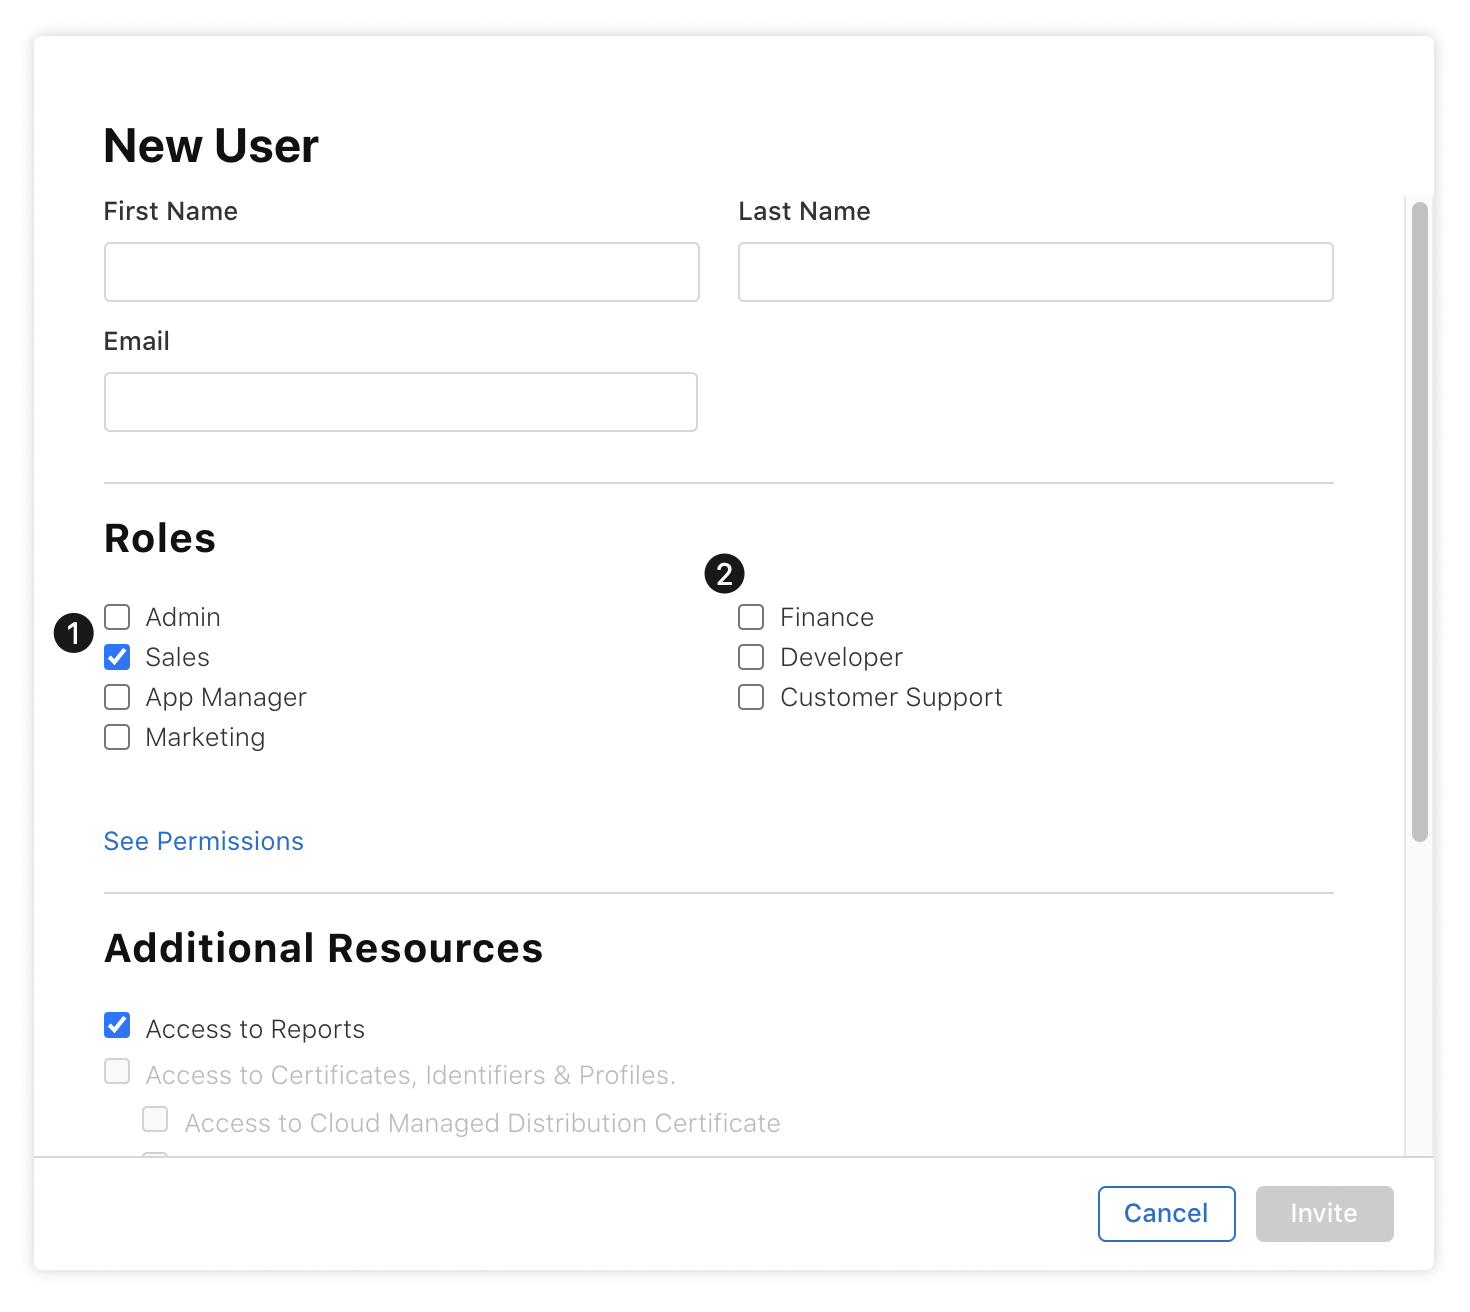
- Set the First Name and Last Name fields to to Appfigures and Analytics
- Set the email field to an email that isn't your main email but you have access to.
- Select the following permissions from the list: Finance and Customer Support.
- Click Invite.
It should look something like this:
Apple will send an email to the address you provided. Follow the instructions in the email to complete the setup.
When setting up your password we suggest using a complex password since you won't really have to remember it after entering it into your Appfigures account.
When you have a password, proceed into your Appfigures account's Linked accounts screen and link the account using the email address and password from the previous steps.